Original Creations

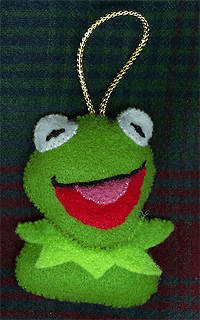 |
Here’s a closeup of Kermit. I used an icon that had been enlarged into a cross-stitch pattern to draw out the parts I needed to make Kermit. I actually really like how this one turned out…with the exception that I think I should have used green thread instead of black for the embroidery around the top of the mouth. |
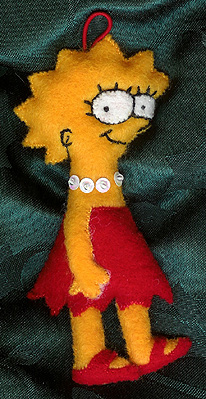 |
I totally wanted to do a Simpsons ornament, so I picked my favorite character, Lisa. Her face came out a little demented compared to what it looked like in my mind, so if I were to redo her the face would have the proportions adjusted better. But she’s still way cool. The shoes were a little tricky to sew on as well, and might have been easier if I’d cut them from one piece instead of two. But the “cartoon” style that the Simpons are drawn in makes them lend themselves very well to being cut out of pieces of felt. I used the opalescent white sequins to make her pearl necklace, but I think I should have hung it a little higher on her neck. |
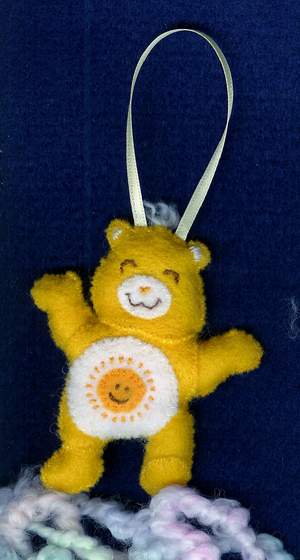 |
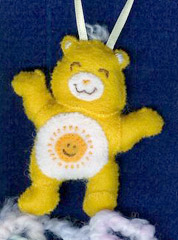
This is Funshine Bear (a carebear). I used a jpg picture of funshine, scaled to the size I wanted as my template. Funshine was the very first ornament I made from my own pattern. The embroidery on the belly worked really well. The tail and tuft of hair on the top is such a cute touch, but was a little tricky to attach as I was using yarn (the same yarn pictured at the bottom of the picture that is supposed to look like a light fluffy cloud but looks a little thin and more like a rats nest). Funshine came out a little skinny, because when you stuff the ornament, the appendages get narrower and more round. Only carebears are supposed to be kind of big and furry, so all the “tube-like” dimensions would have came out better if I’d compensated by adding a 1/4 or so to all the “skinny” dimensions for fabric for the depth. That and a lot of the seperate pieces don’t show up as detail very noticably so I might as well have cut the whole front out of one solid piece rather than individual limbs (other than the bottom of the foot on the front which really does need its own piece for appearances) But I was still pleased with the ornament none the less. I was really surprised how quick this one went together too since it was really the first small one I’d done that didn’t have lot of sequins and only minimal embroider that does not inclue any big cheek circles. |
Creations from Kits
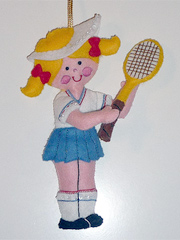
tennis player is from “Good Sports” (Bucilla Kit 48620)

Noel is from “Christmas Wishes” (Bucilla Kit 48615)
And a bunch more that are of both kinds:
 |
This one is the first ornament kit I ever completed. This one is a full Bucilla kit. A number of these ornaments were supposed to have Fringe on the bottom of the scarves, but I decided the fringe was too difficult to make and just left it off. And the first one I made the mitten, was actually supposed to be a right handed glove, not a left handed one. Only I didn’t realize the printed side of the fabric was supposed to point out, so I have a left handed mitten. But in some ways that’s kind of original and different. |
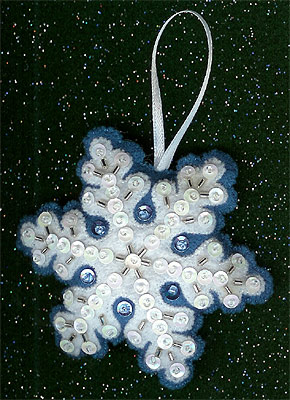 |
This snowflake came out really cool. I love the silver buggle bead embroidery. I got three more of them to make too. The kit showed that you’re supposed to make the snowflake as the upper half of two dangling ornaments (the other halfbeing an animal), but I decided to make the snowflakes as separate ornaments instead. I used white ribbon for the cord, and that worked really nicely, the ribbon looks a lot nicer than “several strands of floss”, though after this ornament, I started migrating more toward using the thick metallic cording because it looks very ornament-like. |
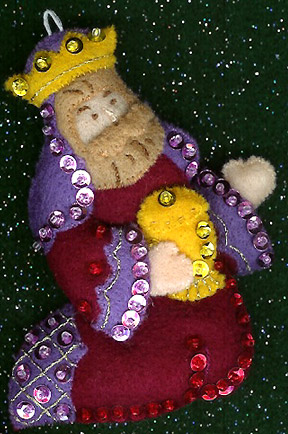 |
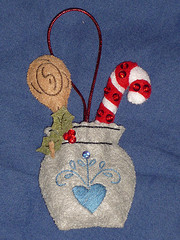
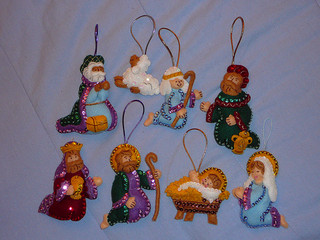
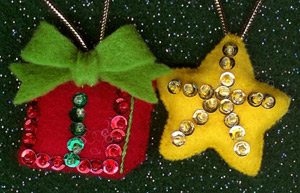
This was the first ornament from the Nativity set that I made, picked to be first because I thought the burgandy was such a rad color of felt to work with and was excited about the pretty colors in this kit. The metallic gold thread was really tough to work with though. The gold thread came wrapped around a piece of cardboard, so every time it hit where it had been wrapped around the edge there’s an irregularity in the texture, and in some cases the shiny part frayed and revealing the white thread its wrapped around. And then, this thread was about half as thick as a strand of the normal embroidery floss. On this one I tried just making a small loop to attach and ornament hook to; that style works good for hanging on a tree. |
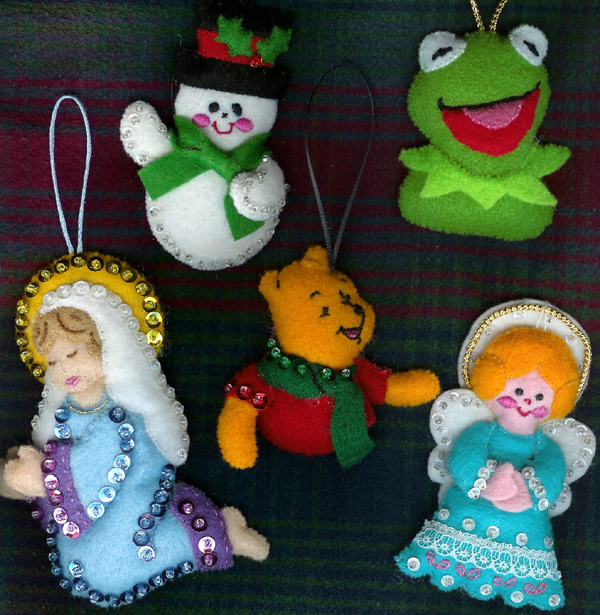 |
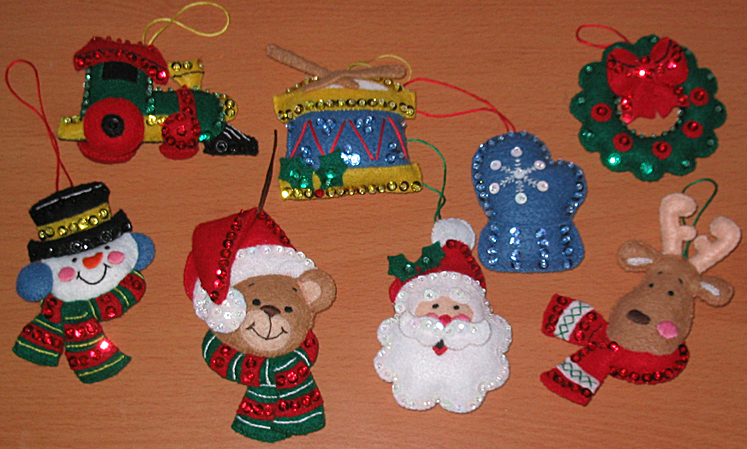
Except for Kermit, these ones are all made from kits. You can’t see it in this picture, but that snowman is from a mobile kit, so it has a bajillion sequins on the back as well. Those sequins took a long time to finish. But it gives a very finished look so on a top branch of the tree where both sides of the ornament are visible, it looks more polished than one with a plain back with nothing on it.
Pooh, on the other hand (technically only half of the ornament since I decided not to sew Pooh and Kanga together) was a really quick sew since he’s both smaller and has very few sequins and not a whole lot of embroidery. I’m a little partial to the angel, because I really liked the light blue color of her dress and the dress was really fun to make. The halo and wings were a little tricky to figure out how to attach since the picture did not clearly show the back of the ornament and I couldn’t decide whether the halo should be stitched between the front and back of the head or in the very back. I eventually just guessed. The lace on the dress was really fun to work with too, I’d definitely try more of the lace! Mary was kind of fun, my second one from the nativity set, again, we got fun baby blue body. The metalic gold thread used on Mary’s neck was so thin and hard to work with that I decided to just stitch the arms with purple instead. |
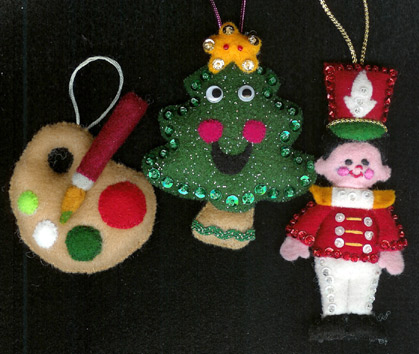 |
The paint palette was made shortly after Kermit using (yep, again) an icon as the inspiration for what a paint palette looks like. Icons work well in that they’re very simple, and for something of this scale, you have to cut out a lot of detail and go with simple lines, because cut fabric is much less precise than hand-drawn lines. I made this one specifically because after seeing some really (mind you, expensive) cool ornaments of surfing snowmen, I decided I really wanted to make some ornaments that reflected my own interests and personality–and what could reflect me better than an ornament showcasing my interest in art? I used acrylic paint on the tip of the paintbrush to make it green, which was kind of experimental, but I liked how it turned out, so I’d definitely experiment more with acrylic paint on the felt. Its definitely a lot easier than embroidery.
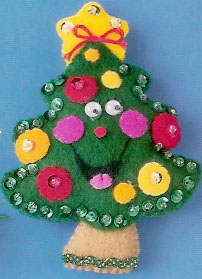
The tree was something I made because I had an itch to use the green glitter-print felt I had, and a christmas tree seemed like a good fit. It worked out well that I had a non-stamped kit that makes three christmas trees–so I used that as my pattern, but made a few modifications to make it prettier. It turns out the glitter felt is a little tricky to work with because its a lot stiffer (thicker) than the normal felt–on the one hand that makes the embroidery a lot easier, but on the other, the fabric is a lot less flexible so it doesn’t hold its fluffy shape as well.I used hot glue to attach the eyes and that worked really good. In fact, hot glue also worked really well on the back side of the fabric for attaching the gold corded hangar, and for securing the ends of the gold cord so they wouldn’t fray. Attaching the rick-rack on the bottom was a little trickier. I got it real good the first time…and then realized I’d glued it to the wrong side of the felt. So then I had to cut another tree trunk and try again as I hadn’t cut a trunk in the back (just solid green) and the trunk is not symmetrical. But the glue-gun started getting a little too warmed up and was gloppy, so I had to redo the rick-rack part again, and it came out okay, but I think it was better on the original when the glue gun was just starting to warm up enough for the glue to melt and would only give very small amounts of glue at a time.. This ornament is unusual in that unlike most of the other ones I’ve made, there isn’t one thing that glares out at me that “I could have made this part better if I had done this instead”. The soldier is from the mobile kit again (you guessed it…I decided to make individual ornaments instead of attaching them to the mobile), so everywhere you see sequins on the front, there’s sequins on the back too (excepting the “buttons” on the front of his shirt) and those sequins take a long time to sew. Also since this is an older kit it uses primarily 3mm sequins instead of 5mm sequins so that means a lot more of the sequins to stitch on! I think aesthetically the 3mm sequins make a much better trim around the ornament, but they do make the edge stitching more difficult since a larger percentage of your stitches begin or end underneath a sequin. |
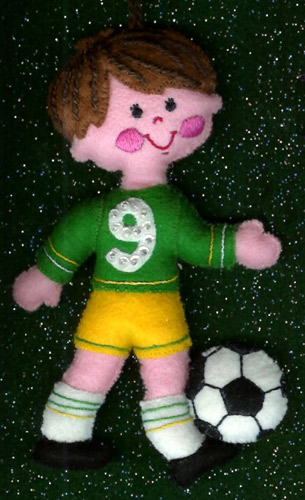 |
The soccer player took a real long time to finish. He has almost no sequins, but the large size (6″ tall…most of the others average around 4″) and extensive amount of embroidery took a long time to do. Plus he’s just made of a lot of seperate pieces. Mostly though, I think it was all the backstitching the stripes on the clothes, and the yarn embroidery on the hair that took a long time. The yarn was a little tough to work with because its so thick, but it does give a really awesome effect when done. |
 |
These two were from the “trim-a-tree” set. The one nice thing about these ones is that because of their small size (1 to 2″) they are very quick to do compared to big ornaments, so near christmastime I could whip out an entire ornament in one evening over the course of a single movie rather than the usual one ornament completed per week, so after doing some slow ornaments you really feel like you’re getting a lot done so quickly! |
Non-Felt Christmas Ornaments
As a bonus, here’s some other fun Christmas ornaments I’ve made that aren’t felt:
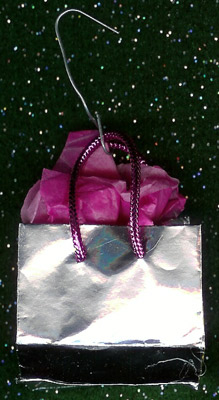 |
This one is an origami shopping bag, made out of silver origami paper. I used pink tissue in it (from a victoria’s secret shopping bag no less) and used hot-glue to attach the bag handles (magenta metallic cord) which was probably the hardest part of this one. I decided after making this ornament that I should do more origami tree decorations next year–even if they don’t have the durability of felt or plastic ornaments, they are very colorful and unique and not just like “everyone else’s” tree. |
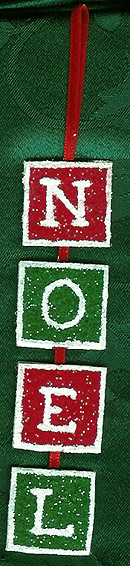 |
NOEL: so this one is mostly felt, but it was a no-sew project, so its on this page. Its actually two-sided. Each side says the same thing, but the colors alternate in the opposite order. Ribbon connects the squares and makes a hook on the top. The lettering and borders are white acrylic paint. It took a couple coats to get the paint solid enough that you weren’t looking at significant number of felt fibers through the paint. It came out really cool though so I’d be inclined to want to attempt another project like this again. |